

Editing Your New Images
I'll use Corel PaintShop Pro X6 for this exercise. If you do not have an image editor that supports layers, this might be a good one to start with. You can download a free trial version at www.paintshoppro.com/en/products/. This is currently selling for $60 or $80 for the Ultimate version which includes new face retouching technology. If that works well that feature alone is worth the price. Other layered photo manipulation products include Adobe Photoshop which appears to have moved to the cloud for $49 per month. Photoshop Elements is still of this earth and selling for $60 - $70 right now. You'll find others out there if you search for them.
To get to your scanner driver, use the Import command on the File menu. If you have a TWAIN compliant scanner, you are in luck. PaintShop Pro still addresses the TWAIN scanner drivers. If you have a WIA compliant scanner, choose Import -> from Scanner or Camera to load the common WIA Dialog. To get the advanced features of you WIA scanner, use the driver as a stand-alone program, saving the images as TIFF files. Just be sure you know where you are saving the files.
Basic image editing is pretty much the same across all the photo manipulation programs, but the user interface is what differs, and there are some wide variations. Below is the first screen of the PaintShop Pro program.
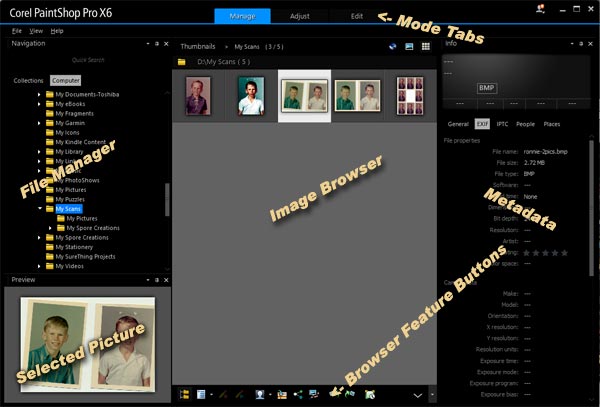
PaintShop Pro Home Screen (File Manager)
Find The Picture to Be Processed
Use the file manager to navigate to the location of your scanned images. Select their folder. The images should be displayed in the large center panel. If you wish, you can click the General tab in the meta data panel and cycle through your pictures and apply a rating to each one. Click the highest star you want to apply and they will light up and also appear in the EXIF tab. Fyi, Exif stands for Exchangeable image file format and this metadata is carried in the file. Select an image that needs some correction.
Crop and Straighten
I have selected an image that contains two pictures. If I really want both to be in the finished image, I will separate them for processing then create an image file large enough to hold both later when they are finished. For now, I will crop the first image and work on that one.
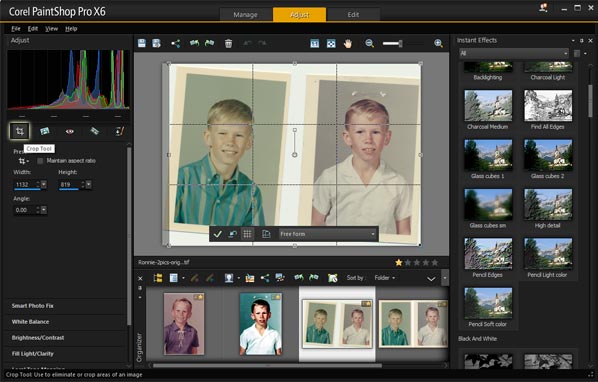
PaintShop Pro Adjustment Screen (Cropping Tool highlighted)
The first thing I will do is to crop the image so that only the picture I intend to correct remains. Select the Cropping Tool. Drag the tool around the picture you want to save. Don't be too careful because it's crooked and you can't get it exactly right. If you missed anything, use the two-headed arrow cursor to drag the edge. Click the image when you are satisfied that you have the clipping borders right. Only that which was within the clipping borders should remain. Notice the available settings in the cropping panel. If you have a predetermined size for your picture, you can set those dimensions there and the cropped image will be that size.Now, straighten the image. They say a picture is worth 1000 words. Here it is.
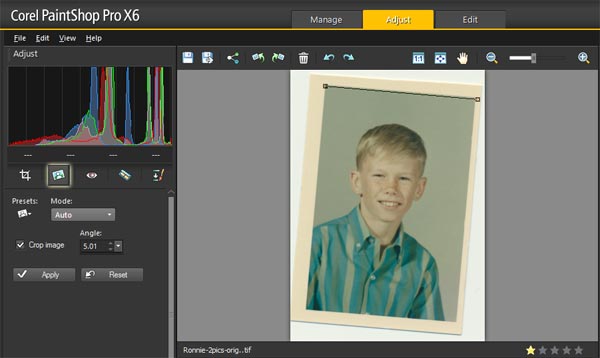
Part of the PaintShop Pro Adjustment Screen (Straighten Tool highlighted)
If your scanner driver didn't straighten your image, this is the time to do it. Click the Straighten tool and the rubber band line pops up on the middle of your image. Drag the ends to something that you want to be perfectly horizontal (or vertical), such as an edge. Click Apply in the Straighten panel at the left. And you're done. That's the easiest way to straighten an image I've ever seen.Now you can go back and crop the image to the edges of the picture. Drag the tool around the edge, then individually drag the edges of the grid to match the edges of the picture. Click the picture and you're done. This picture had no correction done with the scanner driver so, now we'll work on the color and contrast. Save your image with a new number suffix.
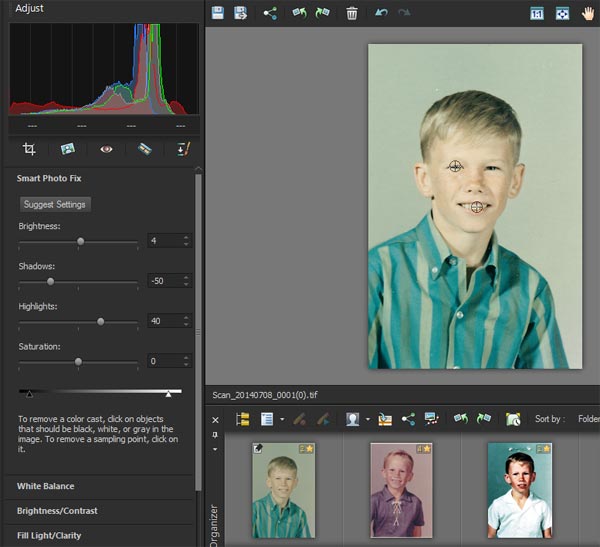
Part of the PaintShop Pro Adjustment Screen (Smart Photo Fix active
Color Cast and Contrast
 This picture has a color cast and the contrast almost doesn't exist. We'll use Smart Photo Fix. Click that name on the left panel. After Smart Photo Fix panel opens, notice the instructions to remove a color cast near the bottom of the panel. About the only true black you'll find in a portrait is the pupil of an eye. I zoomed the picture until I could see the pupils and click on one of them for the black point. (Zoom is the + to the right of the hand icon on the tool bar above the work image.) I used a tooth for the white point. A button might have worked well, too. with black & white points set, click the Suggest Settings button in the Smart Photo Fix panel. From there you can tweak the sliders a bit until you are satisfied with the look. I ended up with the Shadows slider at -63 and the Highlights at 19. Save your image with the suffix number incremented. Be sure to save it in the folder for the family branch where this person is a member.
Finishing Touches
You may need to eliminate imperfections caused by dust, lint or damage to the original picture.
Save a small image for screen display.
After the editing was finished, I saved the image with the suffix incremented, selected the Edit tab, and did not save as the program suggested. That would save any changes made subsequent to last save and lose the state of the image at last save. If you have made changes after the last save, increment the suffix and save.
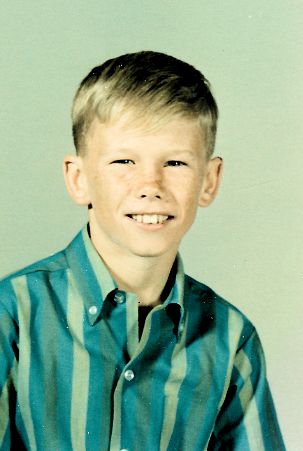
I wanted to make a reduced size JPEG image for this article. On the Edit tab, choose Image -> Resize from the menu at the top. In the Resize popup, you have some choices of what scale to use, Inches, Centimeters, or Millimeters (Corel is a Canadian company, and they use the metric system.) in the top box and Pixels and Percentage in the middle one. Make sure the padlock is closed to protect the aspect ratio of the picture. I prefer to use pixels for images destined for screen viewing as other scales make no sense there, so I entered 200 for the width of my resized image and let the program figure the height. Then clicked OK. I now have a picture that is 200 X 298 pixels to mount on this page. Save this image as a JPEG file.
We now have a completed image saved as a full-size TIFF file and a smaller one saved as a JPEG. Save the JPEG in the family folder beside the TIFF with the pixel width as a suffix. If they have the same name, there will be no doubt that they belong together.