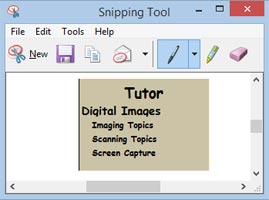
Screen Capture
By Pat Tyler, Computer Enthusiast
You see images taken from computer screens all over the place these days. How do they do that?Like so many other computer topics there is more than one answer to this question for a Windows computer. Using your keyboard alone you have these options:
- Capture whole screen: Press the key PrtScn to put an image of your screen in the clipboard (memory). Paste the image anywhere you can paste an image. If you create a new image in your favorite image editing software, you can perform any edits you wish before saving it to your hard drive.
- Capture whole screen and save as a file: Press the Windows logo key
 + PrtScn. This will place a png image in a Screenshots folder under your Pictures folder.
 - Capture a screenshot of only one window Press Alt + PrtScn This will put the image of only the active window on the clipboard.
- Capture any part of the screen you wish. You have several options to do this your way: New with Windows 8.1 is the Windows Snipping Tool and the capture tool in IrfanView the freeware "Swiss Army Knife" of Windows imaging. This article will cover these two options.
Use Windows Explorer search to locate the SnippingTool.exe. C:\Windows\System32 is the usual location for this and other Windows utilities. Right-click the file name, then select Create Shortcut (or Pin to Start or Pin to Taskbar in the case of Windows 8) to give easy access to the program.
Start the program. Open the drop-down list under New, and select from the list of snip types: Free-Form Snip, Rectangular Snip, Window Snip, or Full Screen Snip. Personally, I find that Rectangular is the easiest and most useful. Drag your cursor around the area you want to capture. When you let go of the mouse button your capture will appear in the client window of the Snipping Tool. It also resides on the clipboard to be pasted in an application of your choice.
At this point the
 The Snipping Tool menu and Icons offer several options for handling your screen capture.
- File menu: New Snip, Save As ...,
Send To, and Exit - Edit menu: Copy (to the clipboard)
- Tools menu: Pen (in choice of colors), Highlighter, Eraser (for your pen marks or highlights), Options (selections of ways the Snipping Tool behaves)
- Help menu: Help (This help is no longer available. Use your favorite search engine and search for Windows Snipping Tool.) About (Will give you information about your version of the Snipping Tool.)
IrfanView (Any version of Windows)
For basic and background information about this program, see the IrfanView article available on this menu under Tips ->Freeware -> Image Editing Software.
On the Options menu, choose Capture/Screenshot (or press C) To bring up the Capture Setup window.
 Click this image to see an image of it now. Once you have entered your choices, the program will remember them. You'll only look at it if you want to change something. When your choices are selected, press Start.
 IrfanView will get out of your way to allow you to make your selection of the screen portion to capture. Paste your capture in your favorite image editing software or you can use IrfanView as your editor. You may also choose to send your capture to your printer.
Experiment to see how easy it is to capture your screen or any part of it. If you can get an image on screen, you can almost always capture it to use for your own purposes. Be ever mindful of copyright issues.
Notes: If you wish to capture an area larger than will display on your screen at one time, use two or more captures to get what you want, then use image editing software to stitch the images together.
Your screen capture might look like text, but it is really an image, just like any other picture. You cannot edit the text or search for content as you would text in a word processor.

