Simple Loom Knitted Scarf
Simple Loom Knitted Scarf
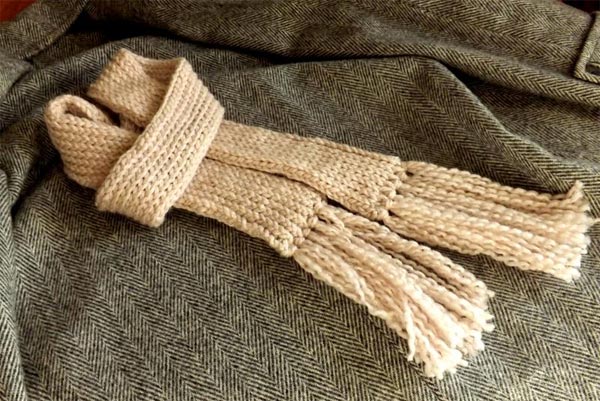
To make a flat scarf on a round loom, you have two choices. You can make a single layer flat scarf by using half of the pegs on the loom or a double scarf by using all the pegs. On both of these designs the ends will be straight to keep the scarf flat. Decorative fringe can be added to the ends of the double scarf to hold the sides together, or simply to add interest to the scarf.
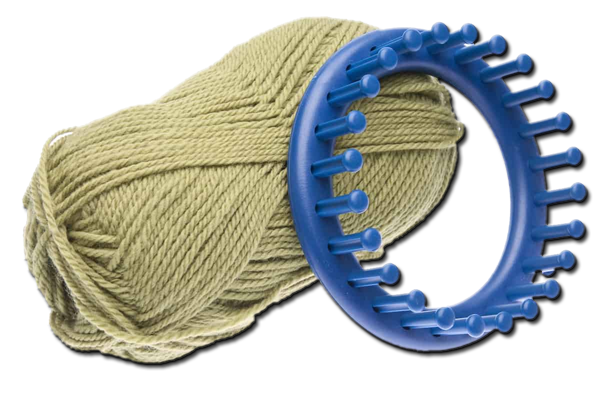
Round Loom and ball of yarn
Skill Level: Beginner
Finished Size:
Materials:
- A round knitting loom
- A yarn hook
- A loom pick or small crochet hook
- Yarn needle
- Enough skeins of yarn to make the size of acarf you want to make in the color/s of your choice. Here's a page of yarn suggestions from the author. On this page, she gives us the benefit of her knowledge about different types of yarn.
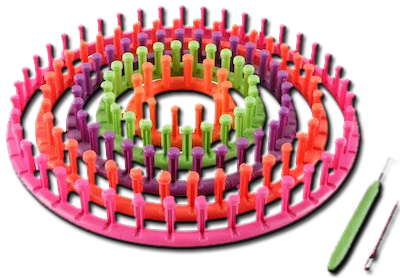
Set of Round Knitting Looms
Instructions:
- Step 1: Attach Yarn to Loom
- Tie the end of the yarn to the anchor peg.
- Wrap the yarn around the back side of the first peg on the left side of the anchor peg.
- Continue to wrap the yarn around the pegs about half way around the loom.
- Push the yarn down the peg to the bottom. Note: For a wider scarf, use more pegs and for a thinner scarf, use fewer pegs.
- Step 2: The Return Row
- Wrap the yarn twice around the last peg to make it face the way you came.
- Continue to wrap the yarn around the pegs in a clockwise direction.
- Step 3: The Knitting Process
- With the loom pick pull the bottom yarn up and over the top yarn on each peg, beginning with the first stitch all the way to the last.
- When you get to the last peg in the row, wrap the yarn in thee same direction around the last peg.
- Continue wrapping the other stitches in the opposite direction than that of the row before. Make sure to keep the bar between pegs on the inside of the loom.
- Keep knitting until you have the length you desire.
- Step 4: Finish it Off
- Wrap and knit around the first two pegs.
- Move the loop from the second peg over to the first.
- Knit the bottom loop up and over the top loop.
- Move the last loop back over to the second peg.
- Repeat these steps until you get to the last peg.
- Leave a 6 inch tail, cut off the yarn and pull it through last loop.
- Close up the ends.
- Tip: To change colors, tie the new color onto your yarn and continue the next row with the new color. Learn how to do a purl stitch to add texture like seed or ribbing to your scarf. And, if you want to learn how to tie a scarf into a bandeau, we have another article waiting for you.
The Double-Sided Scarf (Option 2)
- Step 1: Tie Off the End
- Anchor the end of your yarn on the peg at the side of the loom. You can use a slip knot or any other type of knot. Just make sure it is secure.
- Step 2: Wrap the Pegs
- Starting from the left side of the peg (or right side depending on whichever feels more comfortable) wrap the yarn around each peg on the loom.
- When you come back to the first peg, pull the yarn taunt.
- Continue around the loom one more time.
- Step 3: Knit the Yarn
- Use your loom pick to pull the bottom row up and over the top row. This is called knitting. Continue until there is just one loop of yarn on each peg.
- Every time you start a new row, you will wrap the first peg in the row in a way that puts the yarn in front of the peg. The other pegs are wrapped from the back to the front.
- If you started from the left, you will be wrapping counterclockwise on the first peg and clockwise on the rest of the pegs. Every time you finish a row, pull the bottom row over the top row on each peg.
- Likewise, if you started on the right, the first peg will be clockwise and the others will be wrapped counterclockwise.
- Step 4: Take Off the Slip Knot
- Once you have complete a few rows, undo the slipknot leaving the tail of the yarn hanging free.
- If you don’t remove the knot, the finished knitting could end up warped out of shape.
- Continue knitting until you have reached the desired length.
- Step 5: Changing Colors or Adding Another Skein of Yarn
- Change colors whenever you like to create the design you want. To do this, simply tie the new color or second skein to the end of the yarn you are working with.
- Pull the knot very tight and hide it within your stitches.
- Cut the tails off.
- Step 6: Continue Knitting
- Continue with each row – wrapping and pulling until the scarf is the desired length.
- The yarn should finish on the left side to make the next step easier.
- Step 7: Casting Off
- Start on the left side and wrap the yarn around the first peg in a counterclockwise direction.
- Wrap the yarn around the second peg in a clockwise direction.
- On both pegs, pull the bottom loops up and over the top loops.
- Move the loop from the second peg over to the first peg and pull it as tight as possible.
- Pull the bottom loop up and over the top loop.
- You will have a lone loop left off the first peg. Move it over to the second peg.
- Wrap the yarn around the third peg in a clockwise direction.
- Pull the bottom of the loop on the third peg up and over the top loop.
- Move the loop from the third peg over to the second peg and pull it very tight.
- Bring the left over loop on the second peg over to the third peg.
- Continue this wrapping, looping and moving from peg to peg until there is just one peg left with any yarn.
- Wrap one more time and bring the bottom loop up and over the top loop.
- Now take the last loop off the loom. Everything should be good and tight and unravel in your hands.
- Important: Hold on to this last loop so that it doesn’t get lost. You will need it in the next step.
- Step 8: Closing the Ends
- You now have a complete round scarf, but the ends are both open. And we don’t want a round scarf. We want to make it flat.
- Lay the scarf down flat. Thread your knitting needle.
- Put the needle through the top or second row of stitches. Sew over the top to make a nice clean closure.
- Sew all the way to the end, then double back and do it again.
- It’s best not to cut your yarn until you are done because you don’t know exactly how much you will need.
- When you are finished, cut the yarn and tie a very tight knot on thee end. Do the same on the other end of the scarf.
- Step 9: Making the Scarf Flat
The ends are closed up neat and clean, but your scarf is still round!
Let’s make it flat:
- With the scarf laying flat on a hard surface, measure the width with a piece of yarn. Double this width, plus a little extra playroom, and cut it off.
- You will need this length of yarn for about every six inches (15.24 cm) of the scarf. So, if your scarf is 40 inches, you will need about six of these pieces.
- These pieces will be woven into the scarf to help it keep its flat shape. Make sure you choose the same color as the scarf is at that point. If this area is yellow, use your yellow yarn, and so on.
- Weave each piece naturally into the scarf. Try to make it unnoticeable. Weave it in as if it was another row in the stitching.