Reverse Shell Border
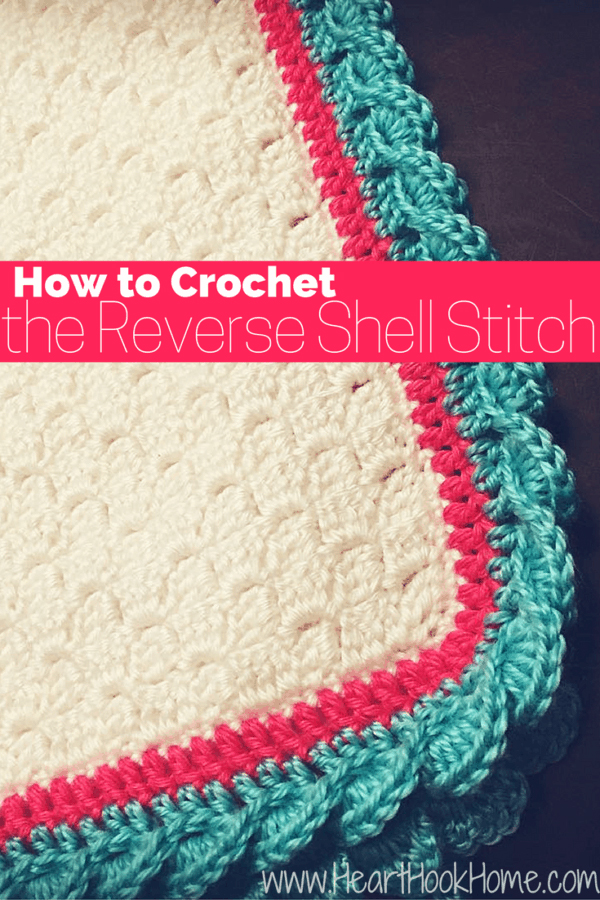
Reverse Shell Border
| Skill Level | Row Count | Pattern Repeat |
|---|---|---|
| Easy | 1 | Multiples of 3 |
Instructions
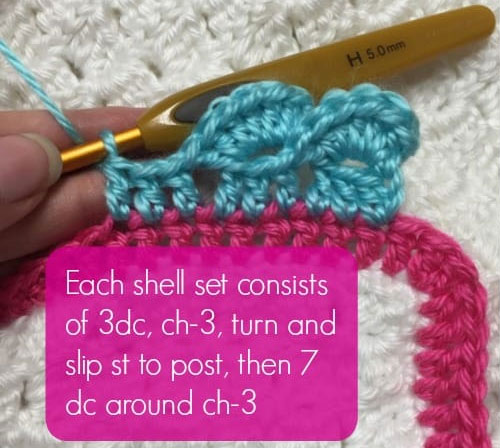
- Chain 3 to begin your first shell. Then, dc in same stitch and in the next two stitches so that you have 3dc in a row. Next, chain three.
- 2. Flip the work to the left so that you are looking at the BACK of the dcs you just created. You’ll slip stitch to the TOP of the ch-3 you made in the very beginning. Then, chain-1 and flip the work back over.
- You have created a ch-3 that you will now work 7 dcs AROUND to create the shell.
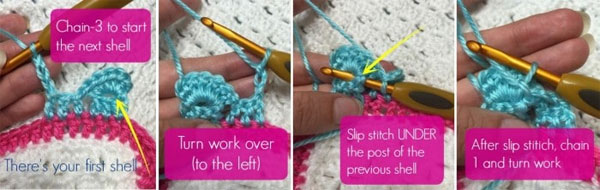
- For the next shell, you’ll dc in the next 3 stitches, then chain-3 and flip your work to see the back, and anchor to the post of the previous shell.
- For each individual shell, you’re just going to continue making three dcs, then make a chain-3, flip work over so that you can anchor to the post of the previous shell, flip back to front and work the new shell around the ch-3. Once you get the hang of it, it is a breeze!
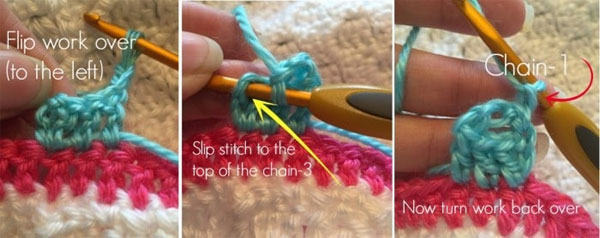
Reverse Shell Border (step 2).

Create the shell

Continue
Summary