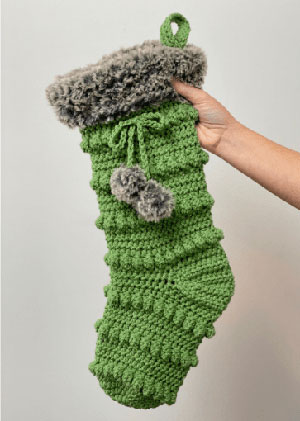
Jolly Christmas Stocking
by A Crafty Concept
https://www.acraftyconcept.com/crafty-boho-stocking/
Jolly Christmas Stocking
Skill Level:
Finished Size: 18" X 6½"
Gauge: 15 single crochet stitches for 15 rows – 4×4 inch square
Materials:
- Size H (5.0mm) crochet hook
- 4-5oz of worsted weight yarn (I use Hobby Lobby’s I Love This Yarn)
- 1 skein of faux fur yarn
- Tapestry needle
- Scissors
Abbreviations, Notes and Tips:
- We will be starting at the toe of our crochet Christmas stocking.
- Bobble: *yarn over, insert hook into stitch and pull up a loop, yarn over and pull through 2 loops on your hook* Repeat 3 more times. Now you should have 5 loops on your hook. Yarn over and pull through all 5 loops on your hook. (do not chain after this, just go straight into your next stitch)
- Work in spiral rounds.
- Row 1: HDC 10 into a magic circle. Join into the top of the first HDC. CH 1. (10)
- Row 2: HDC INC in each stitch around. Join into the top of the first HDC. CH 1. (20)
- Row 3: *HDC INC in the first stitch, HDC in the next stitch*. Repeat that around for a total of 10 times. Join into the top of the first HDC. CH 1. (30)
- Row 4: *HDC INC in the first stitch, HDC in the next 2 stitches*. Repeat around for a total of 10 times. Join into the top of the first HDC. CH 1. (40)
- Row 5: HDC in each stitch around. Join into the top of the first HDC. CH 1. TURN YOUR WORK (40)
- Row 6: *BOBBLE, SC * all the way around. Join into the top of the first BOBBLE stitch, CH 1. TURN YOUR WORK (40)
- Rows 7-10: HDC in each stitch around. Join into the top of the first HDC. CH 1. (40) Turn your work after row 10.
- Row 11: *BOBBLE, SC * all the way around. Join into the top of the first BOBBLE stitch, CH 1. TURN YOUR WORK (40)
- Rows 12-15: HDC in each stitch around. Join into the top of the first HDC. CH 1. (40) Turn your work after row 15.
- Row 16: *BOBBLE, SC * all the way around. Join into the top of the first BOBBLE stitch, CH 1. TURN YOUR WORK (40)
- Row 17-18: HDC in each stitch around. Join into the top of the first HDC. CH 1. (40)
- Row 1: HDC 19. CH 1. TURN YOUR WORK. (19)
- Row 2: DEC over the first two stitches. HDC 15. DEC over the last two stitches. CH 1. TURN YOUR WORK. (17)
- Row 3: DEC over the first two stitches. HDC 13. DEC over the last two stitches. CH 1. TURN YOUR WORK. (15)
- Row 4: DEC over the first two stitches. HDC 11. DEC over the last two stitches. CH 1. TURN YOUR WORK. (13)
- Row 5: DEC over the first two stitches. HDC 9. DEC over the last two stitches. CH 1. TURN YOUR WORK. (11)
- Row 6: INC in the first stitch. HDC 9. INC in the last stitch. CH 1. TURN YOUR WORK (13)
- Row 7: INC in the first stitch. HDC 11. INC in the last stitch. CH 1. TURN YOUR WORK (15)
- Row 8: INC in the first stitch. HDC 13. INC in the last stitch. CH 1. TURN YOUR WORK (17)
- Row 9: INC in the first stitch. HDC 15. INC in the last stitch. CH 1. (19)
- Row 19: HDC 18. HDC3TOG (making up your own spots for your hook to go)
- Row 20: HDC around. Join into the top of the first HDC. CH 1. TURN YOUR WORK. (42)
- Row 21: *BOBBLE, SC * all the way around. Join into the top of the first BOBBLE stitch, CH 1. TURN YOUR WORK (42)
- Rows 22-25: HDC in each stitch around. Join into the top of the first HDC. CH 1. (42)
- TURN YOUR WORK after joining row 25
- Row 26: *BOBBLE, SC * all the way around. Join into the top of the first BOBBLE stitch, CH 1. TURN YOUR WORK (42)
- Rows 27-30: HDC in each stitch around. Join into the top of the first HDC. CH 1. (42)
- TURN YOUR WORK after joining row 30.
- Row 31: *BOBBLE, SC * all the way around. Join into the top of the first BOBBLE stitch, CH 1. TURN YOUR WORK (42)
- Rows 32-35: HDC in each stitch around. Join into the top of the first HDC. CH 1. (42)
- TURN YOUR WORK after joining row 35
- Row 36: *BOBBLE, SC * all the way around. Join into the top of the first BOBBLE stitch, CH 1. TURN YOUR WORK (42)
- Rows 37-42: HDC in each stitch around. Join into the top of the first HDC. CH 1. (42)
- Before joining the last stitch in row 42, switch to faux fur yarn, CH 1. BRIM
- Row 43-44: HDC in each stitch around. Join into the top of the first HDC. CH 1. (42)
- TURN YOUR WORK after row 44.
- Row 45: HDC BLO in each stitch around. Join into the top of the first HDC. CH 1. (42)
- Putting your stitch in the back loop of this row will create the fold-over of the brim of our stocking.
- Row 46-47: HDC in each stitch around. Join into the top of the first HDC. CH 1. (42) Tie off and sew in all your tails.
- Row 1: SC 26 in each stitch. CH 1. TURN YOUR WORK. (26)
- Row 2: SL ST in each stitch. CH 1. TURN YOUR WORK (26)
- Row 3: SC in each stitch. CH 1. (26) Tie off and sew your hook onto the inside of your stocking on the right side (in line with the heel). Refer to the video at the beginning of this post if you need more help.
- Round 1: SC 5 into a magic circle. (5)
- Round 2: SC INC in each stitch around (10)
- Round 3: SC DEC in every 2 stitches and tie off. (5)
- Sew in your first tail, put your tail into the inside of the ball and use it as “stuffing”
- Close up the top of your ball.
- With your acrylic yarn CH 55 and tie off.
- Thread your chain under 3 HDC stitches near the center of the front side of your stocking.
- Tie your chain into a bow (like you tie your shoes)
- Using your tapestry needle, attach your fur balls on each end of the chain and cut off your tails.
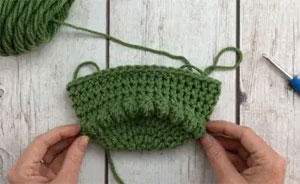
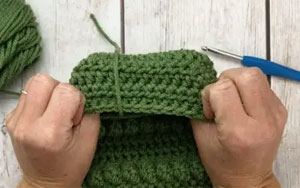
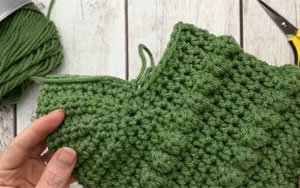
First Few Rounds including bobbles
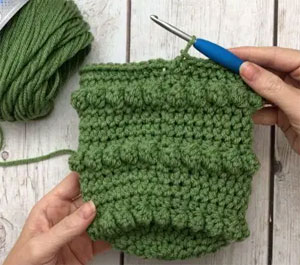
First Few Rounds including bobbles and joining.
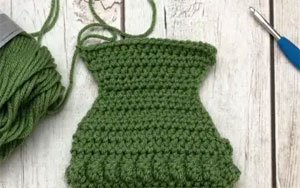
Heel
This is the part of the pattern that will determine if your finished stocking is facing to the left side (like the letter J) or to the right side (like a backward J)
If you want your stocking to be a backward J, just turn your work before you start the heel rows. Mine will face the left, like the letter J, so I will not be turning my work.
 |
 |
These next few steps can sound a little tricky, if you have trouble please refer to the video for guidance. If you still have trouble, don’t hesitate to reach out to me via email.
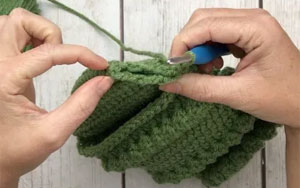
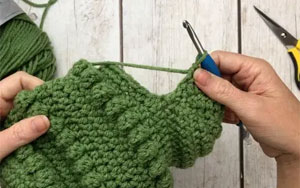
Now we are going to SC the corners of the heel together so it’s closed.
With your hook still in your working yarn, insert your hook into the side of the first half of your heel and the side of the second half of your heel.
You will have to make up your own spaces for your hook to go since you will be working along the raw side of your work.
 |
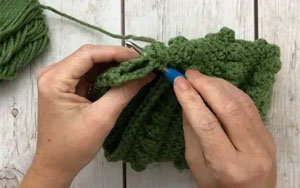 |
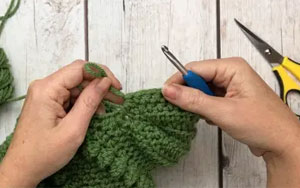
Continue to SC the heel halves together until they are completely attached. This was 7 SC for me.
Tie off.
Attach yarn here.
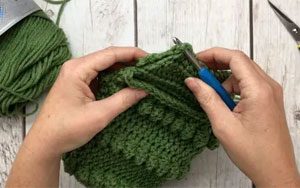
Attach your yarn into the top corner of the second side of your heel, right by the fold.
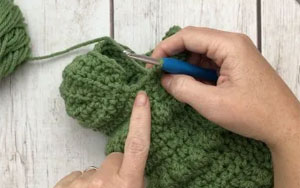
Join the second side of the heel closed with SC stitches, just like the first side, but this time you will start from the fold and work your way back down to the body of the stocking.
Ch 1.
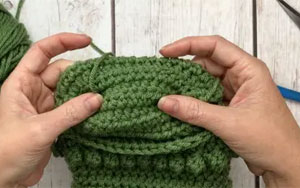
Push and adjust the heel so the SC stitch seems you just created are in the inside of the stocking. Now we are going to start back on the body of the stocking with row 19.
 |
 |
 |
 |
|
| This part is a little tricky. We have to keep the row clean even though there’s a weird join from the heel. If you HDC3TOG here you can avoid having a giant hole in your stocking. HDC 22. HDC3TOG for the last stitch. Join into the top of the first HDC. CH 1. (42) |
||
 |
 |
|
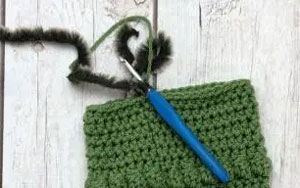
Attach yarn and attach here.
HOOK
CH 27
FINAL DETAILS
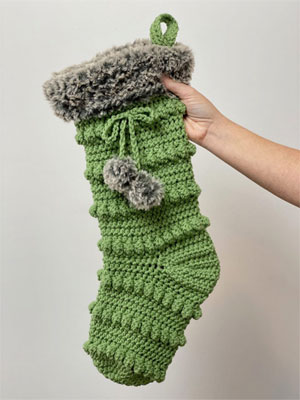
Finished project.
Using your furry yarn. Make 2