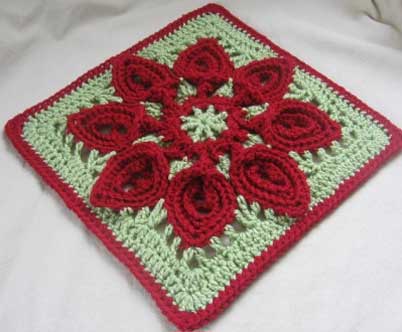
Purifying Puritans Square {Tips}
by Dedri Uys
https://lookatwhatimade.net/crafts/yarn/crochet/block-a-week-cal-2014/block-45-purifying-puritans-square-tips/
https://lookatwhatimade.net/crafts/yarn/crochet/block-a-week-cal-2014/block-45-purifying-puritans-square-tips/
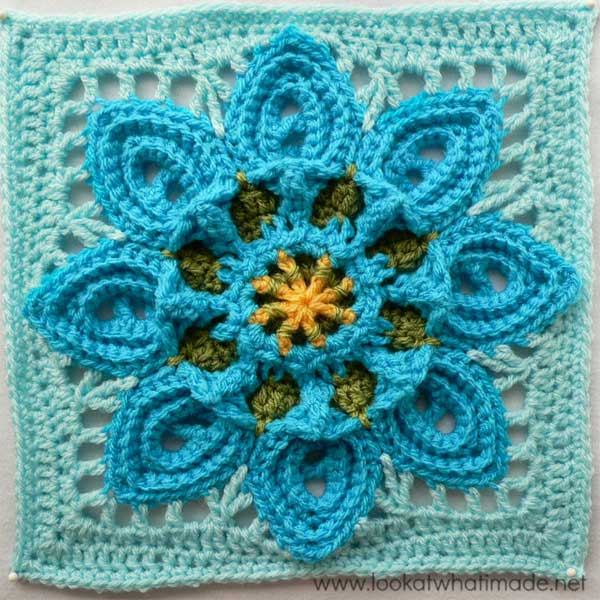
Purifying Puritans Square {Tips}
Skill Level:
Finished Size: 12" X 12"
Materials:
- 5.5 mm Clover Amour Crochet Hook (I)
- Worsted weight yarn
Gauge:
Abbreviations, Notes and Tips:
- Purifying Puritans Square Tips
This Square consists of 3 parts or "steps".
Flowers
Firstly you will need to make the flowers. They are made one by one and consist of 5 rows each: Rows 1 — 4 and a finishing row. Why rows? Because each one is worked back and forth, turning at the end of each row, before making the next flower.
You will complete the first flower (Pages 1 — 6 of the Photo Tutorial). Flowers 2 — 7 will be attached to the previous flower using the End Petal Instructions (Pages 7 — 9 of the Photo Tutorial). Flower 8 will be attached to Flower 7 AND Flower 1 on the finishing row using the Petal Eight Only instructions.
Each flower is joined to the next in a JAYGO (join as you go) fashion. There will be 2 "joining stitches" between each petal: a bottom joining stitch and a top joining stitch. 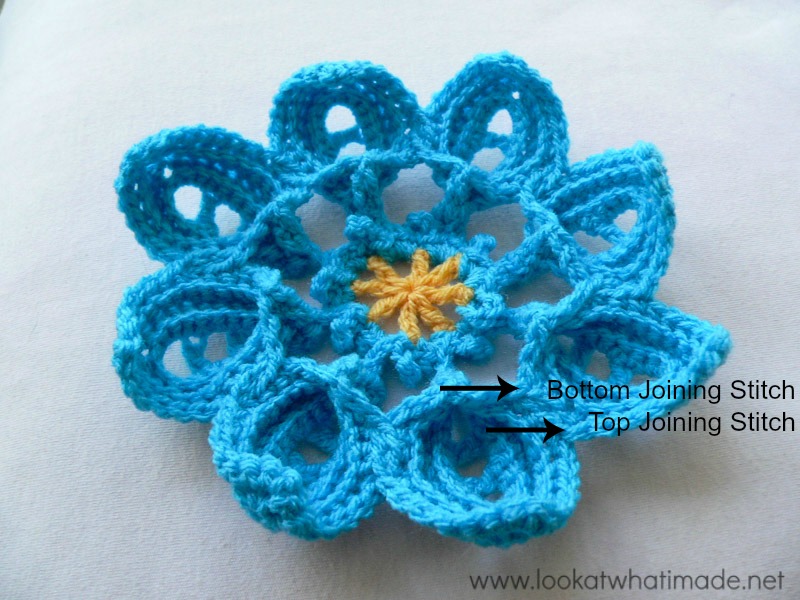
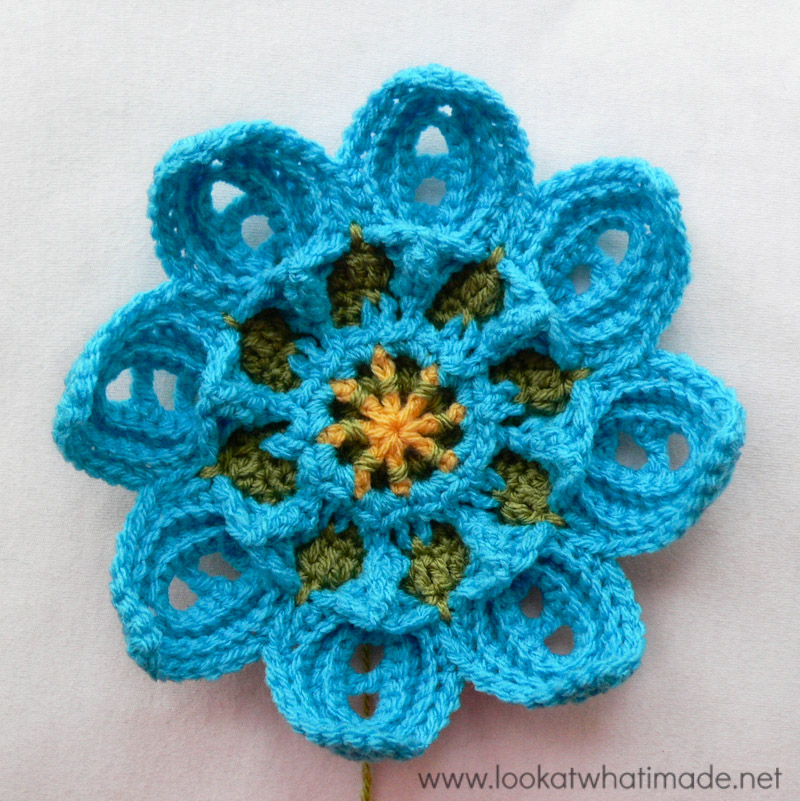
- Background
Once your flowers are completed you will make a background circle behind the �stems� of the flowers. This circle consists of 7 Rounds. It starts as back post stitches around the center of the flowers (the homebase as Margaret calls it). You will anchor this circle to the flowers by catching the picot stitches in Round 5 of the background circle...
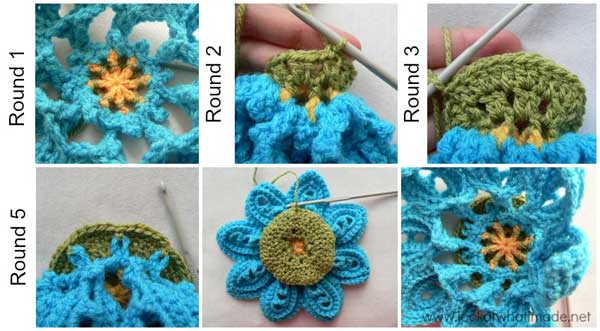
... and by catching the bottom joining stitches (between flowers) in Round 7 of the background circle.
To catch the bottom joining stitch, you need to insert your hook from the back of your work between the two joining stitches (Photo 1). Then insert it front to back into the space that contains the picot (indicated with an arrow in Photo 1 and illustrated in Photo 2). You are basically inserting your hook around the bottom joining stitch. Then insert your hook into the next st of the background circle (Photo 3) and complet a sc (Photo 4). This will create a little vertical stitch on the front of your flower (Photo 5).
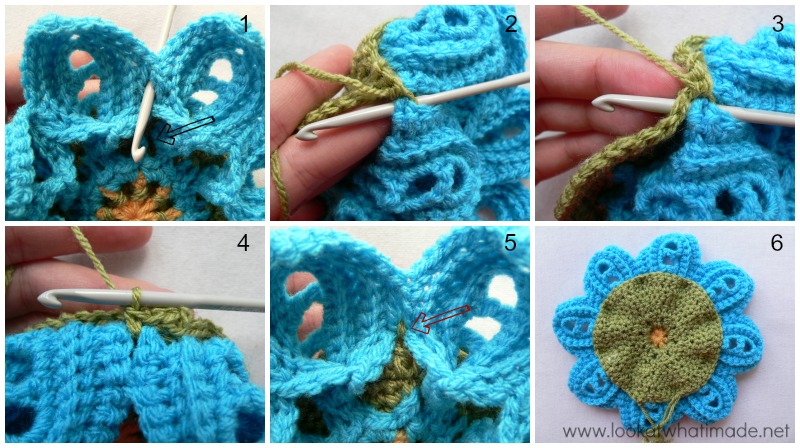
- This is round 7 with background completed.
- Border Rounds
Finally you will build your square by making what Margaret calls the Border Rounds.
These start as a BLO (Back Loop Only) Round worked into the flowers.
Pages 11 — 17 of the Photo Tutorial cover Border Round 8 in detail.
Border Round 9 is straightforward. The only hint I can give you as that all the stitches for this round are made into the ch-2 spaces. The only stitches you will be working into are the tr3tog's.
Border Round 10 was easy.
For Border Round 11 I used single crochet instead of hdc, because this square packs a LOT of stretch. - I have decided against adding an optional additional round for this square, so this is the only one that I have done that doesn't have between 160 and 164 sts as a final round stitch count.