Tree Frog Amigurumi
by Kristi Tullus https://kristitullus.com/blogs/news/free-pattern-tree-frog
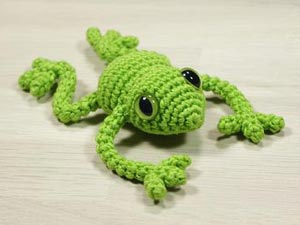
Tree Frog Amigurumi
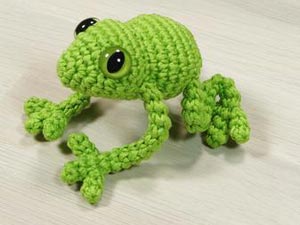
This little tree frog is not too complicated to crochet, but it does have very tiny details and wire inside the legs, which are a bit fiddly to make. But if you have some patience and enjoy working on small details, it's right up your alley. Happy crocheting! Skill Level:
Finished Size: About 12 cm (4 3/4") long including legs, body is about 6 cm (2 1/3"), when crocheted with sport weight cotton and a 2,00 mm crochet hook (US size 1/B).
Materials:
- Yarn. I used Titan Wool Egitto, a sport weight cotton yarn, 50g =120m (50g =130yd) / 5 ply / 12 wpi / 2: fine. You will need about 20 g or 40 m (50 yd) of yarn.
- 2,00 - 2,75 mm crochet hook (US hook size 1/B - 2/C) or according to the yarn.
- Polyester fiberfill, wool, wadding etc. for stuffing.
- 12 mm safety eyes or buttons, beads, felt etc.
- Yarn needle, scissors, stitch marker.
- Wire and strong tape or "pipe cleaner", wire cutters or pliers.

Instructions:
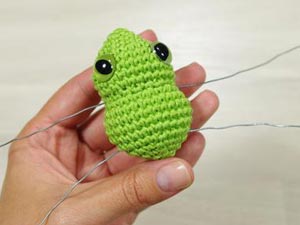
- Head & Body
- mr, sc 6. [6]
- (sc, inc) X 3. [9]
- sc 2, inc 3, sc 3, inc 3 sc 2 [13]
- sc 3, inc 3, sc 5, inc 3, sc 3 = [17]
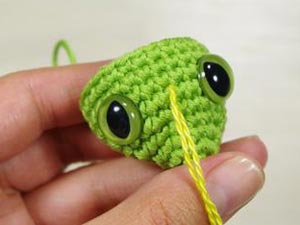
- sc 6, inc, sc, inc, sc, inc, sc 6 = [20] Place a stitch marker between the 12th and 13th stitch on round 6 and leave it there. This marks the center of the forehead. Use it as guide when placing the eyes.
- sc 5, inc3, sc 9, inc3, sc 4 = [24]
- Rnds 7-9: sc in each stitch = [24] Attach safety eyes to either side of the stitch marker, between rows 6 and 7, leaving 8 stitches (count 7 holes) between them.
- sc in each stitch = [24]
- sc in each stitch = [24]
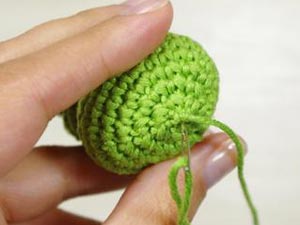
- sc 8, dec, (sc, dec) x 3, sc 5 = [20] Start stuffing the head. Keep adding a bit of fiberfill after every few rounds, stuffing the head and body firmly.
- sc 7, inc, (sc, inc) x 4, sc 4 = [25]
- sc 7, inc, sc 12, inc, sc 4 = [27]
- sc in each stitch = [27]
- sc in each stitch = [27]
- sc in each stitch = [27]
- sc in each stitch = [27]
- sc 6, dec x 2, sc 5, dec, sc 4, dec x 2, sc 2 = [22]
- sc 6, dec x 2, sc 2, dec, sc 2, dec x 2, sc 2 = [17]
- sc 5, dec x 2, sc, dec, sc, dec x 2 = [12]
- dec x 6 = [6] Finish stuffing. Cut the yarn, leaving a long yarn tail, and close the opening. Fasten and hide the yarn tail.
 |
 |
-
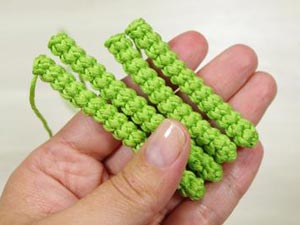
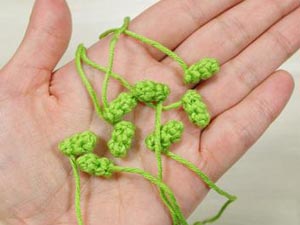
Front legs (make 2)
- mr, sc 5. [5]
- 2-14: sc in each stitch. [5] Cut the yarn, leaving a long yarn tail for sewing, and fasten off. Do not stuff the legs.
- Back legs (make 2)
- mr, sc 5. [5]
- 2-17: sc in each stitch. [5] Cut the yarn, leaving a long yarn tail for sewing, and fasten off. Do not stuff the legs.
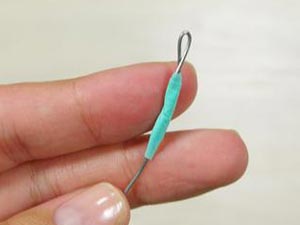
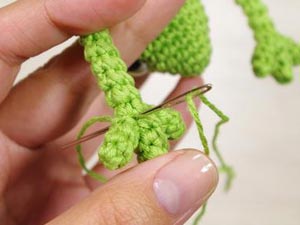
- Cut two pieces of wire long enough to fit inside the legs and through the body, plus about 5 cm (2") so you you can bend back the ends. Push the wires through the body where you want the legs to be.
- Bend one end of back and then wrap a bit of tape around the wire to make sure it won't poke through the fabric.
 |
 |
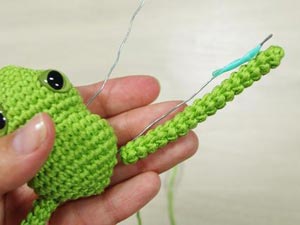
- Push the wire inside the leg and sew it to the body.
- Hold up the other leg and bend the wire so it's the right length. Push it inside the second leg and sew the leg to the body. Do the same with the front legs.
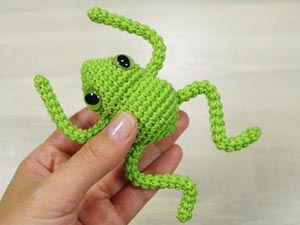
- Bend the legs to shape.
 |
 |
 |
 |
 |
 |
I would love to see how your little frogs turn out, so do post a photo to my Facebook page or tag me in your social media posts, I'm @kristitullus on Instagram, Facebook and Twitter.