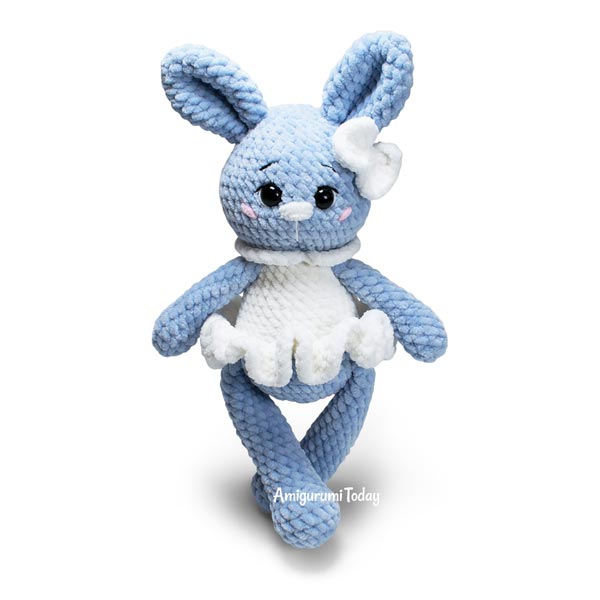
Blue Bunny
by Amigurumi Today https://amigurumi.today/amigurumi-plush-bunny-in-dress-crochet-pattern/
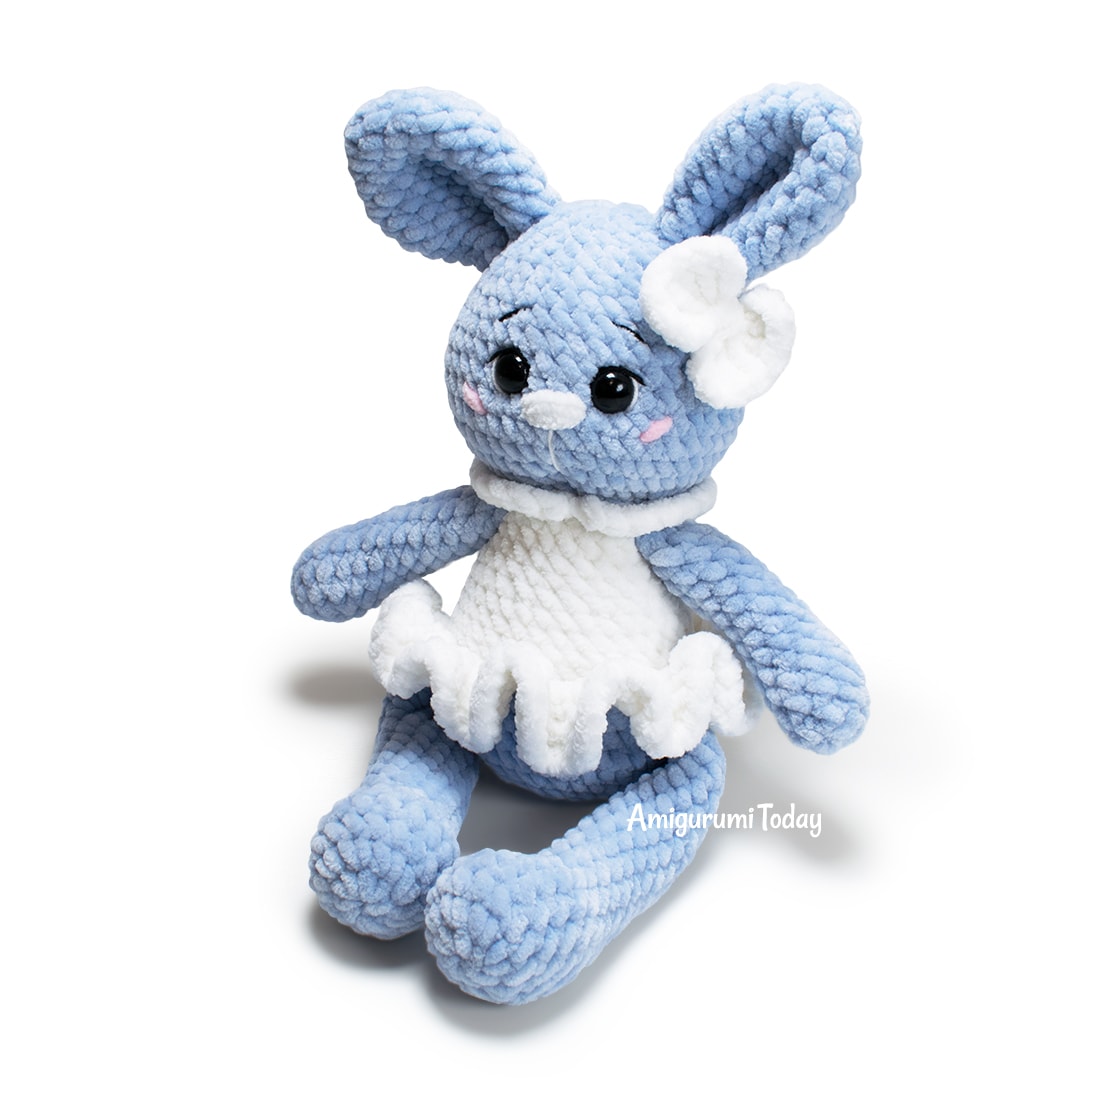
Blue Bunny
Skill Level: easy
Finished Size: medium size — about 8.7" sitting including ears
Using non-velour worsted yarn, the bunny measurs about 7" tall sitting including ears.
Materials:
- (#4, worsted) Yarn with plush velour texture (3.5 oz)
Actual usage: Color A: Red Heart With Love, 1.5 oz. (80 yd.); Color B: Lion Brand Basic Stitch, 1.9 oz. (101 yd.). Bunny will be color A, dress will be color B. - 4.0 mm (G) crochet hook
- 12 mm Safety eyes
- Polyester fiberfill
- Black & white embroidery thread
- Scissors and yarn needle (Optional)
- T pins
- Row counter (Susan Bates)
- Stitch marker (like tiny plastic safety pins)
Abbreviations, Notes and Tips:
- ch = chain
- st = stitch
- sc = single crochet
- inc = increase (2 sc in one stitch)
- dec = decrease (2 sc together)
- sl st = slip stitch
- hdc = half double crochet
- dc = double crochet
- tr = treble crochet
- (..) = repeat the instructions in brackets the given number of times
- [..] = total number of stitches
Instructions:
- Ears: (make 2) Crochet with color A.
- Rnd 1: 6 sc in magic ring [6]
- Rnd 2: (inc) repeat 6 times [12]
- Rnd 3: (sc in next st, inc) repeat 6 times [18]
- Rnd 4: (sc in next 2 st, inc) repeat 6 times [24]
- Rnd 5-7: sc in all 24 st [24]
- Rnd 8: (sc in next 2 st, dec) repeat 6 times [18]
- Rnd 9-11: sc in all 18 st [18] Finish with sl st.
- Rnd 1: 5 sc in magic ring [5]
- Rnd 2: (inc) repeat 5 times [10]
- Rnd 3-14: sc in all 10 st [10] Stuff only the hands.
- Rnd 15: Flatten the edges and crochet sc in the next 5 st through both layers, closing the hole. Fasten off.
- Rnd 1: 8 sc in magic ring [8]
- Rnd 2: (inc) repeat 8 times [16]
- Rnd 3-5: sc in all 16 st [16]
- Rnd 6: sc in next 4 st, (dec) x 4 times, sc in next 4 st [12]
- Rnd 7-21: sc in all 12 st [12] Stuff only half of the legs.
- Rnd 22: Flatten the edges and crochet sc in the next 6 st through both layers, closing the hole. Fasten off.
- Rnd 1: 6 sc in magic ring [6]
- Rnd 2: (inc) repeat 6 times [12]
- Rnd 3: (sc in the next st, inc) repeat 6 times. [18]
- Rnd 4: (sc in next 2 st, inc) repeat 6 times [24]
- Rnd 5: (sc in next 3 st, inc) repeat 6 times [30]
- Rnd 6: (sc in next 4 st, inc) repeat 6 times [36]
- Rnd 7: sc in all 36 st [36] Attach legs while working on the next round.
- Rnd 8: sc in next 6 st,
sc in the next 6 st crocheting through the stitches of both the leg and the body,
sc in the next 12 st of the body,
sc in the next 6 st of both the other leg and the body,
sc in the next 6 st of the body. [36] - Rnd 9: sc in all 36 st [36] Change yarn to Color B.
- Rnd 10: sc in all 36 st. [36]
- Rnd 11: sc in all 36 st in back loops only (blo sc or blosc) [36]
- Rnd 12: sc in next 9 st, dec, sc in next 14 st, dec, sc in next 9 st [34]
- Rnd 13: sc in next 7 st, dec, sc in next 16 st, dec, sc in next 7 st [32]
- Rnd 14: sc in all 32 st [32]
- Rnd 15: sc in next 13 st, dec, sc in next 2 st, dec, sc in next 13 st [30]
- Rnd 16: sc in next 4 st, dec, sc in next 18 st, dec, sc in next 4 st [28]
- Rnd 17: sc in next 7 st, dec, sc in next 10 st, dec, sc in next 7 st [26]
- Rnd 18: sc in next 5 st, dec, sc in next 12 st, dec, sc in next 5 st [24] Attach arms while working on the next round.
- Rnd 19: sc in the next 5 st,
sc in the next 5 st of both the arm and the body,
sc in the next 6 st of the body,
sc in the next 5 st of both the other arm and the body,
sc in the next 3 st of the body [24] - Rnd 20: (sc in next 2 st, dec) repeat 6 times [18]
- Rnd 21: sc in all 18 st [18] Crochet sc in the next several stitches, and switch to color A in the middle of the back.
- Rnd 22: (inc) repeat 18 timesl [36]
- Rnd 23: (sc in the next 5 st, inc) repeat 6 times [42]
- Rnd 24-28: sc in all 42 st [42]
- Rnd 29: sc in the next 9 st, dec, sc in next 20 st, dec, sc in the next 9 st [40]
- Rnd 30: sc in the next 9 st, dec, sc in the next 18 st, dec, sc in the next 9 st [38]
- Rnd 31: sc in the next 10 st, dec, sc in the next 14 st, dec, sc in the next 10 st [36]
- Rnd 32: sc in all 36 st. [36]
- Rnd 33: (sc in the next 4 st, dec) repeat 6 times [30]
- Rnd 34: (sc in the next 3 st, dec) repeat 6 times [24] Insert safety eyes in the sead between Rnt 28 and Rnd 29 (leave about 5 sts between the eyes).
- Rnd 35: sc in all 24 sts [24]
- Rnd 36: (sc in next 2 st, dec) repeat 6 times [18]
- Rnd 37: (sc in the next st, dec) repeat 6 times [12]
- Rnd 38: (dec) repeat 6 times [6] Fasten off leaving a small tail.
- Rnd 1: 2 ch, 2 dc in each loop till the end of Rnd 10, join with sl st [72]
- Rnd 2: 2 ch, 2 dc in each st till the end of the round, join with sl st. [144] Fasten off and weave in the end.
- Row 1: sc in 2nd ch from hook, hdc in next ch, dc in next 24 ch, hdc in next ch, sc in next ch. [28] Fasten off leaving a tail for sewing.
- Rnd 1: In magic ring: (4 ch, 4 tr, 4 ch, sl st) repeat 2 times. Fasten off leaving a tail for sewing.
- Rnd 1: 6 sc in magic ring [6]
- Rnd 2: (sc in next st, inc) repeat 3 times [9]
- Rnd 3: sc in all 9 st [9] Finish with sl st. Fasten off leaving a tail for sewing. stuff a little bit with fiberfill.
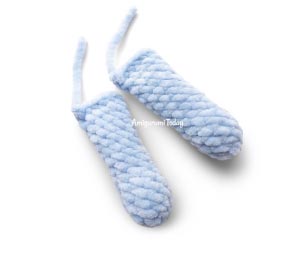
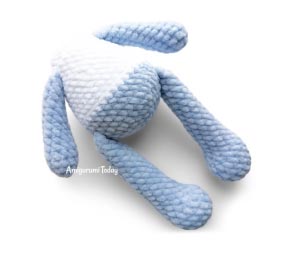
Blue Bunny ears
Fasten off leaving a tail for sewing. Do not stuff ears.
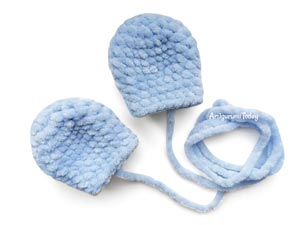
Blue Bunny arms
Arms: (make 2): Use color A.
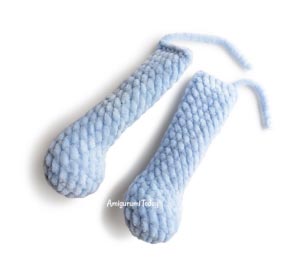
Blue Bunny legs
Legs: (make 2) Use color A.
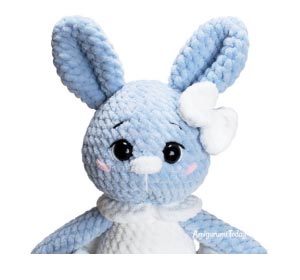
Blue Bunny body
Head and body: Begin croching the body with color A. Stuff as you go.
Weave in the yarn tail in front loops of the last 6 sts with your hook or yarn needle, then pull to close the hole. Hide the end.
Blue Bunny bow
Skirt Use color B yarn.
Attach Color B to one of the front loops of Rnd 10 of the body.
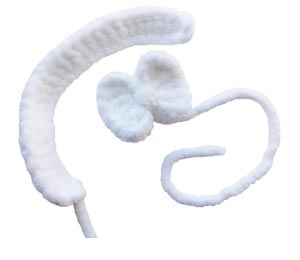
Blue Bunny collar & bow
Collar: Use Color B.
Foundation: Crochet 29 ch with color B.
Bow: Use color B.
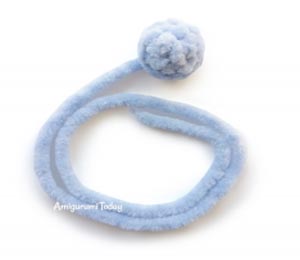
Blue Bunny collar & bow
Tail: Use color A.
Assembly

Face sculpting. See instruction #3 below.
- Sew tail below skirt in the middle of the back.
- Fold ears at the base and pin them to the head above the eyes. Sew them on.
- Make eye indents. Insert the needle at the neck area (point #1 in illustration above), and draw it out at the point #2, insert needle at point #3 and drtaw it out at point #4. Pull slightly. Insert the needle at the point #5 and draw it out at point #1. Pull tightly, fasten off and hide end.
- Embroider a nose with white plush yarn. Embroider a line under nose with white cotton yarn, pulling slightly to make mouth indent.
- Embroider cheek blushing with plush pink yarn.
- Embroider eyebrows, eye lines and eye whites with cotton yarn or embroidery thread.
- Put on the collar and sew the edges together.
- Sew the bow on the head near one of the ears. Your bunny is finished!
Blue Bunny collar & bow