Software Catalog:
Intermediate Forms

|
First we will start the Vendor Entry / Edit Form by copying the Manufacturer Entry / Edit form. Open the Forms page in the database window. Select Manufacturer Entry / Edit and press Ctrl+C to copy and Ctrl+V to paste. Type Vendor Entry / Edit as the name for the new form. Open the new form in design view. We will save some time by using the format of the Manufacturer Entry / Edit form and simply changing the appropriate information. If the properties sheet is not visible click the View | Properties menu. Open the form window enough so that you can click outside the form grid to access the property sheet for the form itself. Click the Property Sheet Format tab and change the Caption from Manufacturer Entry / Edit to Vendor Entry / Edit. We will now change the form binding from Manufacturers to Vendors. Click the Data tab and click the Record Source property. Click the down arrow button. Select Vendors from the list. Now all we need to do is to change the parameters for CalcIDCode sent by CalculatedID and change two properties of each of the text boxes. Select the CalculatedID text box. Click the Data tab of the properties sheet. In the Control Source property change the MfgName to VenName and the "M" to "V". Select the Manufacturer ID label and change the caption to Vendor ID. Click on the label until your cursor changes to an "I beam." Click on the form outside the label when you are done. You can use the Caption property in the property sheet instead. Select the MfgID text box. Click the All tab of the property sheet. Change the Name to VenID. Make the Control Source the current property, click the down arrow, and select VenID from the field list. Change the Default Value to " VXXXX000." SAVE. Change to the Macros page in the database window. Copy the Macro named CalcMfgID and paste it. Name the new macro CalcVenID . Open the new macro in design view and change Item in the lower part of the macro builder from [MfgID] to [VenID]. SAVE and close. Select the VenID text box and change to the Event page. Select the On Dbl Click event and click the down arrow that appears when it is selected. Select CalcVenID, the new macro you just created . SAVE. Tip: Select Ven and copy it to the clip board. Then you'll merely have to select Mfg in each field and paste the Ven. Move down one field and select the MfgName text box. Select the All tab in the property sheet if it is not already the current page. Change MfgName to VenName in both the Name and Control Source properties. Now change the Mfg… to Ven… in both fields of each of the remaining text boxes. When you have finished it's time to test your work. Enter some of your favorite vendors. You can include hardware vendors in spite of the fact that this is a software catalog. This table can be a handy telephone list for all your vendors of computer products including supplies. We really need to get into the nineties and add some Internet addresses — at least the home page address. How about an e-mail address? And what about your account number with them? And if you are using an accounting system that is a relational database system, your vendors will have an A/P account number. Why not enter a field here for that number for easy reference? We'll add those four fields to the Vendors table first then add them to
the form.
Adding fields to a tableOpen the Vendors table in design view. Select the VenUpdate row (it's all highlighted). Press the Insert key 4 times. Below TechSupport type VenHomePage for the name and "Internet Home Page Address" for the description. Leave it the default 50-character Text data type. Use Home Page Address for the Caption. Default Value is " http://www. " including the ending dot. Next add the VenEmail field with E-Mail caption and an appropriate description. The e-mail address may be all numbers but make it a text field because these numbers are not for arithmetic. VenAcctNo will hold the account number you have assigned in your Accounts Payable. Text, 25 characters should be ample. Make it smaller if you're sure you won't need more space. Typically these numbers are 8 to 12 alphanumeric characters. Make the description something like " Our A/P account number." And the Caption could be A/P number. Anything that will not confuse it with the next field. VenOurAcctNo will be next. That is the number that they use to identify you or your company. Description: Our acct. number with them. Caption: Our Acct. No. 25-character Text should be plenty of space. SAVE. We've added four fields to the Vendors table, now we'll add those fields to our new data entry form.
Adding fields to a formOpen the Vendor Entry / Edit form in design view. Use the two-headed arrow and stretch it so you can see the whole form. Stretch the rectangular border around the telephone numbers to the right to make room for the e-mail address and its label. Click the menu View | Field List. Drag VenEMail onto the form to the right of the VenTechSupport field and let go. Select the label and change the caption to E-Mail Address. On the label move your cursor slightly until it forms a hand with a single-pointed finger. Drag the label up to align with the other labels in the rectangle. Then select the text box and use the pointed finger cursor to drag it to the right of VenTechSupport text box. Select the Data Update label and shift-click Update, Selection Code label, and VenSel. With the fist cursor Ctrl-drag them straight down about seven dots on the grid. Deselect them by clicking somewhere on the form. Drag VenHomePage off the field list to the space between the rectangle and the fields you just moved. Align the left property of the label with the left property of the rectangle above. Add " Address:" to the caption. Drag the text box so that it is an appropriate distance from the label and stretch it so that the right edge is directly below the right edge of the rectangle. You can change the Default Value to " http://www." including the ending dot. Drag VenAcctNo and VenOurAcctNo to the form between Update and VenSel. Use the pointed finger cursor and drag the labels so that they are above the text boxes. And use the double arrow cursor to stretch the labels to the same width as the text boxes. Change the labels to read " A/P Account No:" and " Our Account No:" respectively. Shift-click the four new items and click the centered button on the tool bar. Copy the top property of Update to the top properties of the labels. Drag the text boxes down so that one grid dot row lies between the text boxes and their labels. Next we'll insert the new fields in the tab order of the form and we'll be done. Click the menu View | Tab Order. Drag Update so that it is last. Drag VenSel so that it becomes last. Drag VenHomePage so that it follows VenEmail. Recap of the tab order for the whole form: |
|
10. VenTelephone 11. VenFax 12. VenTechSupport 13. VenEmail 14. VenHomePage 15. VenAcctNo 16. VenOurAcctNo 17. Update 18. VenSel |
|
SAVE. Check your work. Enter some vendors, real or imagined. See if the tab order works. Make sure our programming for the VenID works properly, and leave some sample data in the table. If your testing didn't leave any data in the Manufacturers table enter a few records.
Either of these tables alone would provide a good vendor list or manufacturers list. Individually with or without their data entry forms, they are known as flat files. As they are now they are not related to any other tables. After you have some vendors or manufacturers entered in their respective tables, use the buttons near the upper left corner of the screen to change the form view. The small button with the down arrow opens a small menu of the three views. The first is the Design View, illustrated by the icon picturing the ruler, triangle and pencil. Then the Form View depicted by the miniature form. The bullet beside this icon acknowledges that the form was in this view when the screen shot was made. The third is the Datasheet View. Click the down arrow and then on the Datasheet View to see all or the records in the table or a screen full if there are more than can be displayed at one time. |
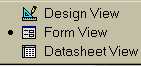 Form View Dropdown Menu |
|
Switch from one view to another to see how easily the view is changed. If you see something that needs to be changed in the form design, simply switch to design view and fix it. Save the change and change back to continue what you were doing. You will return to the first record in the table regardless of where you were when you switched to design. You can use the navigator buttons to return to the record of interest or you can use the Find dialog to search for the record. |
|
Find Button |
|
Click the field where the search value is located then click the Find button on the tool bar. The find dialog pops up. Enter the field value you wish to find and click Find First or Find Next. The Find dialog can be accessed from the Edit menu, and it can be used in either the form view or datasheet view. It is not case sensitive unless you want it that way. The version 2.0 dialog requires that you select a radio button telling Access to search forward or backward. This sometimes-annoying requirement has been dropped in version 7.0. Program Entry / Edit formNext we'll create a data entry form for the Programs table. Only a little help is offered for this one, but follow along. There'll be something new before we finish. Select the Forms tab in the database window and select New. Select Form Wizard in the top window and select Programs from the drop down list. Click OK. The next window gives a list of Available Fields and some buttons with side pointing arrows (greater than and less than symbols some double), and a Selected Fields list, which is empty right now. We will use all of the fields on this form so click the button with the double greater than symbol (>>). This selects all the fields. If you would want to exclude a field you could select it and click the single less than button (<) to move it back to the available fields list. Try moving a field in and out of the selected fields list with the arrow buttons. Be sure all fields are selected before you move to the next window. Press the Next > button when you're ready to move on. Leave the radio button beside Columnar selected and click the Next > button. Select a style of your choice. Move to the next screen and click the second choice to modify the form. Then click finish. You may have to wait a little while Access puts all of this together. Then your form will pop up in design view. Move things around until you like the appearance. Copy the ProgID text box with its label and paste. Drag it to the upper right corner of the form. Change the new label to Calculated ID and change the Control Source to =CalcIDCode([ProgName]," P" ) For better appearance remove the Prog prefix from the label captions, but NOT the Control Source of the text boxes. SAVE. Create a new macro by copying one of the others. Name it CalcProgID. Open the macro in design view and change the Item near the bottom of the screen to [ProgID]. SAVE it and close it. Select ProgID on the Program Entry / Edit form. Select the Event tab in the property list and select On Dbl Click. Click the down arrow and select CalcProgID from the drop down list. Save the form and check your work. Be sure everything works as planned. CalculatedID must follow ProgName in the tab order.
System Entry / Edit formBuild the System Entry / Edit form in the same manner as the Program Entry / Edit form. The form will be based on Systems. The Control Source for CalculatedID is =CalcIDCode([SysName]," Y" ). The macro name for the Double Click Event is CalcSysID . The Item field of the macro is [SysID] . Two fields of the Systems table are related to records in the Manufacturers table and the Vendors table. One reason we like Windows applications better than most DOS applications is that we don't have to keep hard copy lists to provide that kind of information. Entries for the appropriate manufacturer or vendor must be in the table before it can be linked to the Systems table. We can use a combo box to search the table for the appropriate ID code. Here's how: Select the MfgID field in your form and delete it. Find the combo box in the toolbox. It follows the check box on my screen. Select it then click on the form in the space left by the deleted text box and label. Access Version 7.0 will automatically select the Combo Box Wizard tool for you. It's the second in the toolbox, just below the selector arrow. The wizard walks you through the creation of the combo box giving the data source. You will store the MfgID, but you will see the manufacturer's name on screen. In version 2.0 be sure the Control Wizards tool is selected before you drag the combo box to your form if you wish to use it. That is in the lower right corner of the toolbox when it is configured with two columns. |
|
ComboBox Button |
Control Wizard Button |
|
Here's what is required to do the work of the Combo Box Wizard. Select the combo box and make sure its property sheet is visible because that is where our work is done. Fill in or select the values listed below from drop down lists: |
|
Name Control Source Row Source Type Row Source |
MfgIDCombo MfgID Table/Query the wizard wrote the following SQL statement for us: SELECT DISTINCTROW [Manufacturers].[MfgID],[Manufacturers].[MfgName] FROM [Manufacturers]; |
|
Later we'll discover that we can build a select query and use its name on this line to achieve the same thing. Access will build the SQL statement from the query. |
|
Column Count Column Heads Column Widths Bound Column List Rows List Width Limit to List |
2 No 0" ;2.3167" 1 8 2.3167" Yes |
|
The column count is the number of columns to use for the combo box. We will not use column headings. Column Widths of 0" and 2.3" indicates that the first listed MfgID field (see the SQL statement above) will not be visible to the user even though it will be stored in the table. The user will see only the MfgName field and use it as if it were the field to be stored in the table. Bound Column 1 tells Access that the first column (MfgID) is the one bound to the field in the table. List Rows 8 says to list 8 rows in the drop down list. List Width gives the over all list width. We could list both fields by adding 0.6" or 0.75" for MfgID instead of 0" , then adding that to the space allocated for MfgName — 2.3" in this case to give a total List Width. Now select the VenID text box on the form and delete it. Repeat the procedure used to create the MfgID combo box. This time create it for the VenID and use Vendors table to get the data. This time make it so that both columns will show in the list box. Stretch the combo boxes to match the width of the SysName text box above. Give the labels meaningful captions, something like Vendor Lookup or Mfg. Lookup . Notice that the columns to store in the table are the KEY fields of their respective tables. Those key fields are unique and they are indexed. Now the Manufacturers and Vendors tables are linked to the Systems table through their key fields. There is a lot we can do with these tables now that they are related. We'll use this shortly. The combo boxes can only look up the manufacturers or vendors IDs if the needed records are already in the table. We want the convenience of being able to enter any missing data right there on the spot. So we'll add a couple of buttons to open the needed data entry forms if we can't find the manufacturer or vendor. With the System Entry / Edit Form open in design view stretch the detail section down enough to make room for a row of buttons at the bottom. Deselect the Control Wizards button if it is selected. Wizards will only get in our way here. Select the Command Button tool in the toolbox, and draw a button at the bottom of the form. Copy the button and drag the copy into position beside the original. |
|
Command Button |
|
Double click the left button so the cursor is an " I bar" in the button and type the caption: Enter Mfg. Data and repeat with the other button. Make the caption Enter Vendor Data. In the properties sheet name the first button EnterMfgDataCmd and the second EnterVenDataCmd. A little macro magic will do the job for us. |
|
Return to Beginning Continue Previous |
|
This document authored by Pat Tyler Copyright July 1997 |